
Introduction: Revitalise Your Overgrown Shrubs for Abundant Blooms
You know that feeling, right? Staring out at a shrub that was once a vibrant, neat specimen, but has now decided to wage war on your garden space? It’s leggy, woody, barely flowers, and frankly, it’s become a bit of an eyesore. Here in my 800 sq ft backyard in the UK Midlands, I've certainly had my fair share of these botanical bullies taking over precious real estate. Perhaps it’s that ancient Viburnum by the fence, or a Buddleia that’s reached gargantuan proportions, or maybe even a Forsythia that only gives you a meagre scattering of blooms despite its sprawling size.
For years, I'd timidly snip a branch here and there, hoping for a miracle. I used to be an IT guy, you see, and my approach to gardening was initially just as cautious and logic-bound. But gardening, I’ve learned over the last five intensive years, is often about bold moves and trusting nature’s incredible resilience. And nowhere is that more true than with what we call rejuvenation pruning.
This isn't just a trim; it's a full-on reset button for your overgrown shrubs. It feels drastic, I know, almost brutal, but trust me – it’s a game-changer. I've used this technique countless times in my own UK garden, from bringing a tired old Spiraea back to life near my raised beds to completely transforming a neglected Dogwood that was just a tangle of brown stems. The results? Healthier, more vigorous plants, bursting with new growth and, most importantly, an abundance of those beautiful blooms we all garden for.
So, if you’re ready to reclaim your garden space, restore your shrubs to their former glory, and enjoy a riot of flowers again, you've come to the right place. I’m going to walk you through exactly how I approach rejuvenation pruning here in my British garden, sharing the lessons I’ve learned (and a few mistakes I’ve made!) along the way. Let's get those secateurs ready!
Understanding Rejuvenation Pruning: Why & How it Works
So, what exactly is rejuvenation pruning? In simple terms, it's the horticultural equivalent of giving an old, tired shrub a new lease of life by cutting it back hard – often very hard. You might hear it called 'hard pruning' or 'drastic pruning', and it involves removing a significant portion, sometimes almost all, of the existing woody stems. It sounds scary, right? I remember the first time I faced down a particularly stubborn, overgrown Lonicera nitida 'Baggesen's Gold' that was threatening to engulf my compost bin. My hand hovered over the loppers for a good five minutes, convinced I was about to commit shrub murder. But I took the plunge, and the results were nothing short of miraculous.
Why Do We Do It? The Benefits Beyond the Chop
The 'why' behind rejuvenation pruning is actually quite fascinating, and it's all about understanding a plant's natural growth cycle. As shrubs age, especially those that naturally grow quickly, their stems can become woody, less productive, and congested. This leads to:
- Reduced Flowering and Fruiting: Older wood often produces fewer flowers and fruits. By cutting it back, we encourage the plant to produce fresh, young stems that are far more floriferous. My old Hydrangea paniculata 'Limelight', which I’ve grown for three years now, benefits hugely from this, giving me massive blooms every summer here in the Midlands.
- Improved Health and Vigor: Dense, overgrown shrubs can suffer from poor air circulation, which is a big problem in our often damp UK climate. This can lead to fungal diseases like powdery mildew, especially on things like my Buddleias. Hard pruning opens up the canopy, improving airflow and allowing light to penetrate, promoting healthier growth. It also removes diseased or damaged wood, which is always a good thing.
- Restored Form and Size: Let’s be honest, some shrubs just get too big for their boots – and your garden. Rejuvenation pruning allows you to bring an out-of-control plant back to a manageable size and shape, making it a more attractive feature rather than an unruly beast. I’ve rescued several shrubs from being dug up entirely by giving them this treatment, saving me money and effort!
- Stimulation of New Growth: This is the core principle. When you cut back old stems, you trigger dormant buds at the base of the plant or along the remaining stems. These buds then burst into life, producing vigorous new shoots from the root crown. It's the plant's natural survival mechanism, and we're simply harnessing it for our gardening benefit.
How Does It Work? The Plant's Response
When you make those significant cuts, you're essentially telling the plant, "Time to start over!" The plant’s root system, which is still robust and established, suddenly has far less foliage to support. All that stored energy in the roots then gets channelled into producing new growth from those dormant buds. It’s an incredible process to witness.
For example, I had an old, straggly Cornus sanguinea 'Midwinter Fire' (one of my favourites for winter colour) that was just a mess of dull, woody stems. After a hard prune in late winter, by mid-spring, it was pushing out bright green shoots, which by the following winter had transformed into those stunning, fiery red and orange stems that give it its name. That's the magic of rejuvenation pruning in action in our British climate!
It feels brutal, I know, especially for new gardeners. I felt the same way the first time I tackled that Lonicera. But I’ve learned that many deciduous shrubs, particularly those that flower on new wood, thrive on this kind of aggressive haircut. It’s a bold step, but it's a calculated one, and the rewards are well worth the initial trepidation.
Identifying Pruning Candidates: Which Shrubs Respond Best to Hard Pruning?
Now, this is absolutely crucial. Not every shrub is a fan of the dramatic haircut that is rejuvenation pruning. Trying to hard prune the wrong plant can lead to disappointment, or worse, the demise of your beloved shrub. Trust me, I learned this the hard way when I tried to give a leggy old Rhododendron a severe chop early in my gardening journey. It just sat there, sulking, before slowly dying back. Rhododendrons, bless 'em, just don't appreciate a severe chop here in our British climate. They prefer a more gradual renovation.
So, how do you know which shrubs are good candidates for this treatment in your UK garden? It mostly comes down to their growth habit, how they flower, and the type of wood they produce.
Characteristics of Good Candidates:
- Deciduous: Most shrubs that respond well to rejuvenation pruning lose their leaves in winter. This is because they have a strong natural ability to push out new growth from their base.
- Flower on New Wood: This is a big one. Shrubs that produce flowers on growth that developed in the current season are perfect candidates. Pruning them hard encourages lots of new, flower-bearing shoots.
- Multi-stemmed from the Base: Plants that naturally send up multiple stems from the ground or just above it tend to have plenty of dormant buds at their base, ready to spring into action.
- Vigorous Growth: Shrubs that are generally robust and grow quickly will bounce back much faster.
Characteristics of Poor Candidates:
- Conifers: These are almost always a no-go. Conifers typically don't have dormant buds on their old, woody stems, so cutting back into old wood will likely leave you with bare patches that never regrow.
- Flower on Old Wood: Shrubs that flower on stems produced in the previous season will have their flowering potential severely reduced, or even eliminated, for at least a year if you hard prune them. Think of most evergreen Azaleas or Rhododendrons.
- Single-stemmed or Tree-like: Shrubs that develop into a single trunk or have a more tree-like structure (e.g., Japanese Maples) generally don't respond well to being cut back hard to the base.
- Slow-growing: Very slow-growing shrubs will take an incredibly long time to recover, if they ever do.
To make it easier, I've put together a compact table based on my experience here in the UK, highlighting common shrubs and their suitability for rejuvenation pruning:
| Feature | Good Candidate for Rejuvenation Pruning (UK Examples) | Poor Candidate for Rejuvenation Pruning (UK Examples) |
|---|---|---|
| Growth Habit | Deciduous, multi-stemmed from base. | Evergreen, conifers, single-stemmed, or tree-like. |
| Flowering Habit | Flowers on new wood (current season's growth). Encourages more blooms. | Flowers on old wood (previous season's growth). Hard pruning removes next year's flowers. |
| Wood Type | Produces vigorous new shoots from the base when cut back; often has prominent dormant buds. | Lacks dormant buds on old wood; cutting into old wood often results in no regrowth. |
| Recovery Potential | Very high; bounces back quickly with strong new growth. | Low to none; slow recovery, often results in dead patches or plant death. |
| Common UK Examples | Buddleia davidii (Butterfly Bush), Cornus (Dogwood), Forsythia, Lonicera nitida, Sambucus (Elder), Spiraea japonica, Hydrangea paniculata, Lavatera, Mahonia (some varieties). | Rhododendron, Azalea (most evergreen types), Camellia, Laurel (Prunus laurocerasus), Conifers (e.g., Yew, Juniper, Cypress), Japanese Maples (Acer palmatum), Magnolia. |
Always remember, if in doubt, do a bit of research on your specific shrub variety. A quick search for "[Shrub Name] pruning UK" will usually give you a definitive answer. It’s far better to be cautious than to accidentally sacrifice a cherished plant in your UK garden!
Essential Tools & Safety: Gearing Up for the Task Ahead
Before we even think about making that first cut, let's talk kit. You wouldn't try to code without a keyboard, right? Same principle applies here. Good tools aren't just a luxury; they're a necessity for clean cuts and preventing strain, especially when you're tackling a big rejuvenation job in your UK garden. I learned this the hard way, fighting with blunt secateurs and cheap, flimsy loppers for far too long – my poor hands paid the price!
Here’s what I consider essential for a successful and safe rejuvenation pruning session:
Bypass Secateurs (Hand Pruners):
- Purpose: For smaller stems up to about 1.5-2 cm (0.5-0.75 inches) in thickness. Bypass secateurs have two blades that slide past each other, like scissors, making a clean cut that’s better for plant health.
- Randy's Tip: Invest in a good quality pair. I'm a big fan of Bahco or Felco; they’re robust, you can often get replacement parts, and they hold a sharp edge. My Felco 2s have been with me for years, surviving everything my Midlands garden throws at them. Keep them clean and sharp!
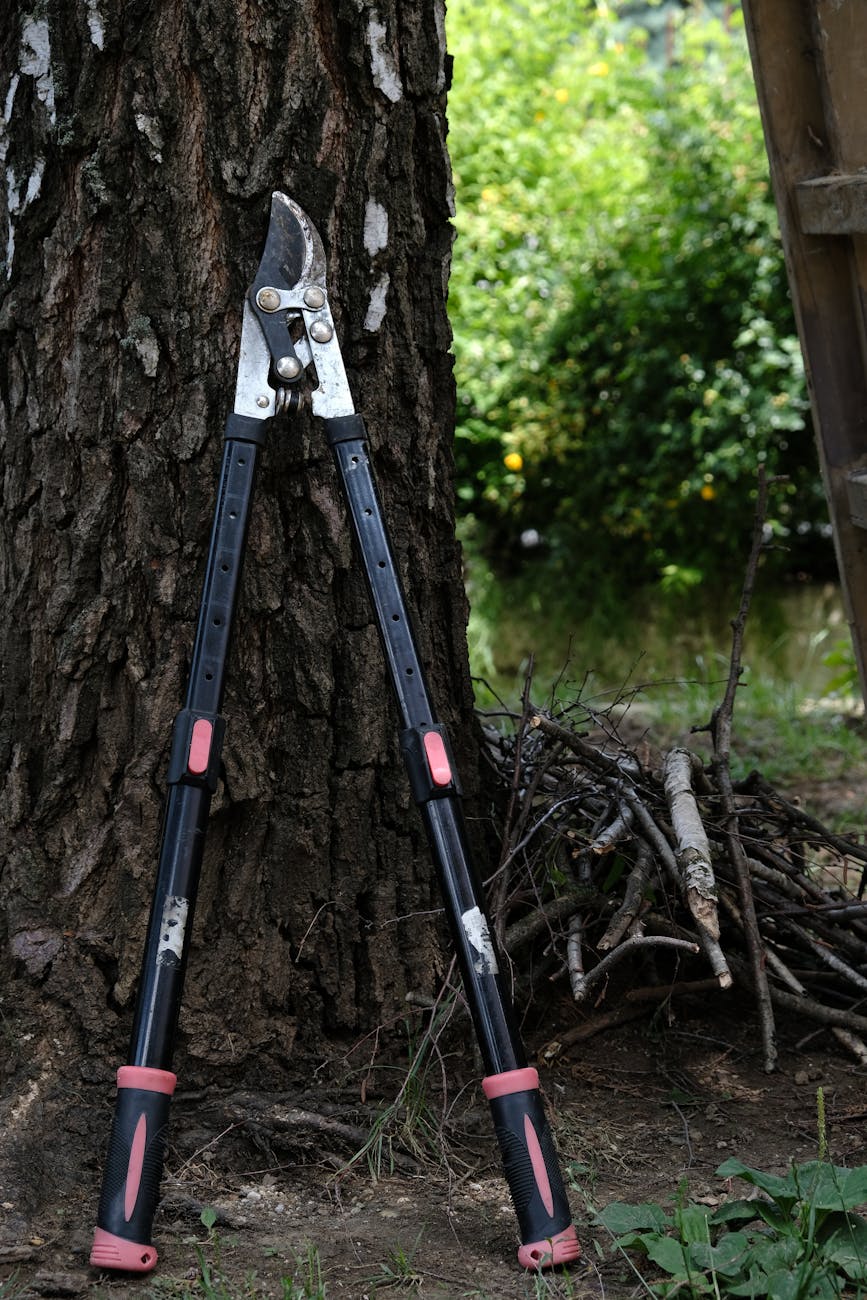
Loppers:
- Purpose: For thicker branches that are too big for secateurs, typically up to 4-5 cm (1.5-2 inches). Their long handles give you extra leverage.
- Randy's Tip: Again, quality matters. Look for bypass loppers for the cleanest cuts. I find the longer handled ones are great for reaching into dense shrubs without getting scratched to bits. My Bahco P160-SL-75 have saved my back countless times on those monster Buddleias.
Pruning Saw:
- Purpose: For the really thick, woody stems – anything over 5 cm (2 inches) that your loppers can’t handle. These are essential for older, seriously overgrown shrubs.
- Randy's Tip: A folding hand saw with a curved blade is incredibly versatile and safe to carry. I always have one tucked away in my shed next to my greenhouse. Make sure it’s sharp; a blunt saw will tear the wood, which can introduce disease.
Work Gloves:
- Purpose: To protect your hands from thorns, splinters, and blisters.
- Randy's Tip: I use sturdy leather gloves for prickly jobs like roses or Berberis, and then a lighter, more dexterous pair for general tidying. Our unpredictable British weather means often working in damp conditions, so a good grip is important.
Safety Glasses/Goggles:
- Purpose: To protect your eyes from snapping branches, flying debris, or sawdust, especially when working overhead or with stiff, dry wood.
- Randy's Tip: This is a non-negotiable. I've had near misses with twigs flicking back, and it's just not worth the risk. A cheap pair of clear safety glasses from any DIY store will do the job.
Disinfectant (e.g., rubbing alcohol or diluted bleach):
- Purpose: To clean your tools between pruning different plants, especially if you suspect disease. This prevents the spread of pathogens.
- Randy's Tip: A quick wipe down of the blades with an alcohol wipe or a cloth dipped in diluted bleach (1 part bleach to 9 parts water) after each plant, or if you cut into diseased wood, is a simple step that can save your other plants.
Tool Maintenance:
Sharp tools make clean cuts, which heal faster and reduce the risk of disease for the plant. They also make the job much easier on your hands and wrists. I make sure to clean and sharpen my secateurs and loppers regularly. After a big pruning session, I’ll give them a good scrub to remove sap and then oil them lightly before storing them in my shed. Our damp UK climate can lead to rust if you’re not careful!
Gearing up properly means you’ll work more efficiently, more safely, and ultimately, you’ll get better results for your rejuvenated shrubs.
5. The Right Time: Seasonal Pruning Windows for UK Shrubs
Alright, so you've identified your overgrown candidates and got your sharp tools ready. Now, for possibly the most crucial bit: when to make those cuts. Trust me, I’ve learned the hard way that timing is everything, especially with our wonderfully unpredictable British weather here in the Midlands. Prune at the wrong time, and you could lose a season of flowers, or worse, stress the shrub unnecessarily.
The general rule of thumb for rejuvenation pruning is often late winter to early spring, during the dormant season, just before new growth really kicks off. This is when the plant's energy is stored in its roots, making it more resilient to a hard prune. But, like most things in gardening, there are always exceptions! Different shrubs have different flowering habits – some flower on old wood, some on new – and that dictates when you should get the secateurs out.
I’ve put together a table based on what I’ve learned works best in my UK garden, specifically considering our often chilly springs and late frosts. This isn't just theory; this is what I've found keeps my shrubs happy and blooming year after year.
| Shrub Type (Common UK Varieties) | Best Pruning Time (UK) | Why (Randy's Experience & Expertise) |
|---|---|---|
| Buddleja (Butterfly Bush) | Late Winter (Feb-March) | Flowers on new wood. Pruning hard in late winter encourages vigorous new shoots that will bear abundant flowers in summer. I usually aim for late February here in the Midlands, before the sap really starts running, but after the worst of the hard frosts. |
| Cornus (Dogwood) | Late Winter (Feb-March) | Grown for their vibrant winter stems. Hard pruning stimulates new, brightly coloured stems. Again, late winter is ideal for me, often when I'm tidying up the greenhouse for tomato season. |
| Forsythia | Immediately After Flowering (April-May) | Flowers on old wood. Pruning too early removes the flower buds! I made this mistake one year – pruned my Forsythia in winter, and come spring, I had barely any of those cheerful yellow blooms. Now, I wait until the last flower has dropped. |
| Philadelphus (Mock Orange) | Immediately After Flowering (June-July) | Also flowers on old wood. Once those fragrant white blooms fade, that's your cue. This allows new wood to develop for next year's display. |
| Hydrangea (Paniculata & Arborescens types) | Late Winter (Feb-March) | These bloom on new wood, so a hard prune encourages larger flower heads. I usually cut mine back to a few strong buds here in my garden; it works a treat. |
| Hydrangea (Macrophylla/Mophead & Lacecap) | Early Spring (March-April) | These bloom on old wood. Rejuvenation pruning involves removing a few of the oldest stems right to the ground, rather than a full chop. Do this when new growth is just appearing, so you can see what's dead. |
| Shrub Roses (older, overgrown types) | Late Winter (Feb-March) | While general rose pruning is more detailed, for a truly overgrown shrub rose, you can prune back hard to about 30-40cm. This encourages strong new basal growth. I've done this with some older, neglected roses in my garden, and they've bounced back beautifully. |
| Ribes (Flowering Currant) | Immediately After Flowering (April-May) | Flowers on older wood. Similar to Forsythia, prune after the display to encourage new flowering stems for the following year. |
Always keep an eye on the forecast, especially for those late frosts here in the UK. If a cold snap is predicted right after you plan to prune, it might be worth delaying for a week or two. New growth can be quite tender!
6. Step-by-Step Guide to Rejuvenation Pruning Your Overgrown Shrubs
Right, let’s get down to business! Facing a massive, tangled shrub can feel a bit like tackling a jungle, but I promise you, breaking it down into manageable steps makes it a lot less daunting. I remember facing my first monstrous Buddleja – it was taller than my greenhouse and twice as wide! I felt a bit overwhelmed, but just taking it one cut at a time really helps.
Here’s how I approach rejuvenation pruning in my 800 sq ft Midlands garden:
Step 1: Assess and Plan – The Grand Tour
Before you even think about making a cut, take a good, long look at your shrub. Walk around it a few times, maybe even grab a cuppa and just observe.
- Identify the good, the bad, and the ugly: Look for dead, diseased, or damaged (the "3 D's") branches. These are your first targets.
- Spot the structure: Try to identify the main, healthy scaffold branches that you want to keep. Imagine the shape you’d like the shrub to eventually take.
- Airflow is key: Look for branches that are crossing, rubbing, or growing inwards – these can lead to problems later on.
- My tip: I often take a "before" photo at this stage. It's incredibly satisfying to compare it to the "after"!
Step 2: Remove the 3 D's – Dead, Diseased, Damaged
This is your starting point. These branches aren't contributing anything positive and can even harbour pests or diseases.
- Dead wood: Usually grey, brittle, and has no green cambium layer when you scratch it. Cut these back to healthy wood or to the main stem.
- Diseased wood: Look for discolouration, cankers, or unusual growths. Prune these back to healthy tissue, making sure to sterilize your tools after every cut to avoid spreading anything nasty. One mistake I made early on was not cleaning my secateurs properly, which led to some spread of fungal issues on my Euonymus.
- Damaged wood: Broken branches from wind, snow, or clumsy gardeners (we've all been there!). Remove these cleanly.
Step 3: Tackle Over-Crowding – Thinning for Health
Now that the obvious problems are gone, it's time to improve the shrub's overall structure and air circulation.
- Remove crossing branches: Choose the stronger, better-placed branch and remove the weaker or ill-placed one. Crossing branches can rub, creating wounds that invite disease.
- Eliminate weak or spindly growth: These thin, often inward-growing shoots won't produce strong flowers or fruit and just compete for light and nutrients.
- Open up the centre: Aim for an open, goblet-like structure for many shrubs. This allows light and air to penetrate, reducing the risk of fungal issues, which can be a real pain in our damp British climate.
Step 4: Reduce Height and Width – The Rejuvenation Cut
This is where the 'rejuvenation' really happens. Don't be shy!
- For multi-stemmed shrubs (like Buddleja, Cornus, Forsythia): You have two main options:
- Gradual Rejuvenation: Remove about one-third of the oldest, thickest stems right down to ground level each year over three years. This is less shocking for the plant.
- Hard Rejuvenation (Coppicing/Stooling): For very overgrown, neglected shrubs that respond well (like Buddleja, Cornus, Salix), you can cut all stems back to about 15-30cm (6-12 inches) from the ground. This will result in a flush of vigorous new growth. This is often my preferred method for truly monstrous shrubs in my garden – it’s a brave cut but delivers fantastic results.
- For single-stemmed or older, woody shrubs: Focus on cutting back to strong, outward-facing buds or side branches. Aim to reduce the overall size by about one-third to one-half, encouraging new growth from lower down.
- Always cut cleanly: Make your cuts just above an outward-facing bud or side branch. This directs the new growth outwards, creating a better shape.
Step 5: Clean Up
Once you're done, gather up all the pruned material. Leaving it around can harbour pests or diseases. I usually add healthy bits to my compost heap after chopping them up, but any diseased material goes straight into the garden waste bin.
7. After the Cut: Post-Pruning Care for Robust Recovery and New Growth
You've done the hard work! Now, it's time to give your revitalised shrub the best possible chance to recover and put on a spectacular show. Think of it like a patient recovering from surgery – a little TLC goes a long way. I've found that these few steps make a massive difference in how quickly and strongly a shrub bounces back in my UK garden.
Water, Water, Water!
Even if it looks bare, your shrub's roots are still working hard, and they'll be pushing out lots of new growth soon. This process requires plenty of moisture.
- Immediate drink: Give the shrub a good, deep watering immediately after pruning, especially if the soil is dry.
- Consistent moisture: Continue to water regularly, particularly during dry spells in spring and summer. Even here in the Midlands, we get those dry spring stretches that can really stress out newly pruned plants. Don't let the soil dry out completely, but also avoid waterlogging.
Feed Me, Seymour! (But Gently)
A hard prune is a big ask for a plant. A light feed will help replenish its energy stores and encourage that vigorous new growth you're looking for.
- Balanced boost: I always give my rejuvenated shrubs a good top-dressing of my homemade compost – it's like a warm hug for their roots, providing a slow-release of nutrients. If you don't have compost, a balanced granular fertiliser (something like a 'Growmore' or a general-purpose feed) applied according to the packet instructions works well.
- Avoid over-fertilising: Don't go overboard with high-nitrogen feeds right after pruning, as this can lead to lush, but weak, growth. A balanced approach is best.
Mulch for Magic
Mulching is one of my go-to gardening hacks for almost everything, and it's especially beneficial after a hard prune.
- Moisture retention: A good layer of organic mulch (like bark chippings, wood chip, or well-rotted manure/compost) around the base of the shrub will help the soil retain moisture, reducing your watering efforts.
- Weed suppression: It also suppresses competing weeds, so your shrub doesn't have to fight for nutrients.
- Temperature regulation: It helps keep soil temperatures more even, which is great for root health, particularly during our changeable British spring weather.
Protection from the Elements
New, tender shoots are particularly vulnerable.
- Frost watch: Keep an eye on the weather forecast for late frosts. If a severe frost is predicted, especially in early spring, a temporary covering of horticultural fleece can protect those precious new shoots from getting nipped. One year, I pruned a Potentilla and then we had a late March frost – those tender new shoots got hit hard. Now I always keep some fleece handy just in case!
- Windbreak: For very exposed sites, a temporary windbreak might be beneficial until the new growth hardens off.
Patience and Observation
Finally, the biggest thing you need after a rejuvenation prune is patience. It might look a bit stark initially, but trust the process.
- Monitor new growth: Keep an eye on the new shoots as they emerge. Look for any signs of pests (like aphids) or diseases, and address them promptly.
- Enjoy the transformation: Over the coming weeks and months, you'll witness an incredible transformation as your shrub bursts back into life, healthier and more vigorous than before. There’s nothing quite like seeing a shrub you thought was a goner burst back to life!
Conclusion: Embrace the Blade, Reclaim Your Garden!
Well, there you have it, fellow gardeners! Rejuvenation pruning might seem like a daunting task, a bit like performing surgery on a much-loved (but wildly out-of-control) friend. But as I've hopefully shown you, with the right knowledge, a bit of courage, and some sharp tools, it's an incredibly rewarding process.
I've tackled countless overgrown shrubs in my 800 sq ft Midlands garden over the years, from leggy Buddlejas to sprawling Forsythias, and every time, the results have been nothing short of spectacular. It's not just about tidying up; it's about breathing new life into your plants, encouraging healthier growth, and ensuring a spectacular display of flowers year after year. It really does make a massive difference, especially when you're trying to maximise every inch of space, like I am here in the UK.
Don't let those overgrown giants intimidate you any longer. Take a deep breath, reread these steps, and go out there with confidence. You'll be amazed at the resilience of your shrubs and the vibrant beauty they'll bring back to your garden. There's a unique satisfaction in seeing a plant you thought was past its prime burst back with renewed vigour and abundant blooms – it’s one of the true joys of gardening, in my opinion!
So, go on, give it a go! Your garden (and your back) will thank you for it. And please, do share your rejuvenation pruning stories and photos in the comments below – I'd love to hear how you get on with your own UK shrubs! Happy pruning!
