
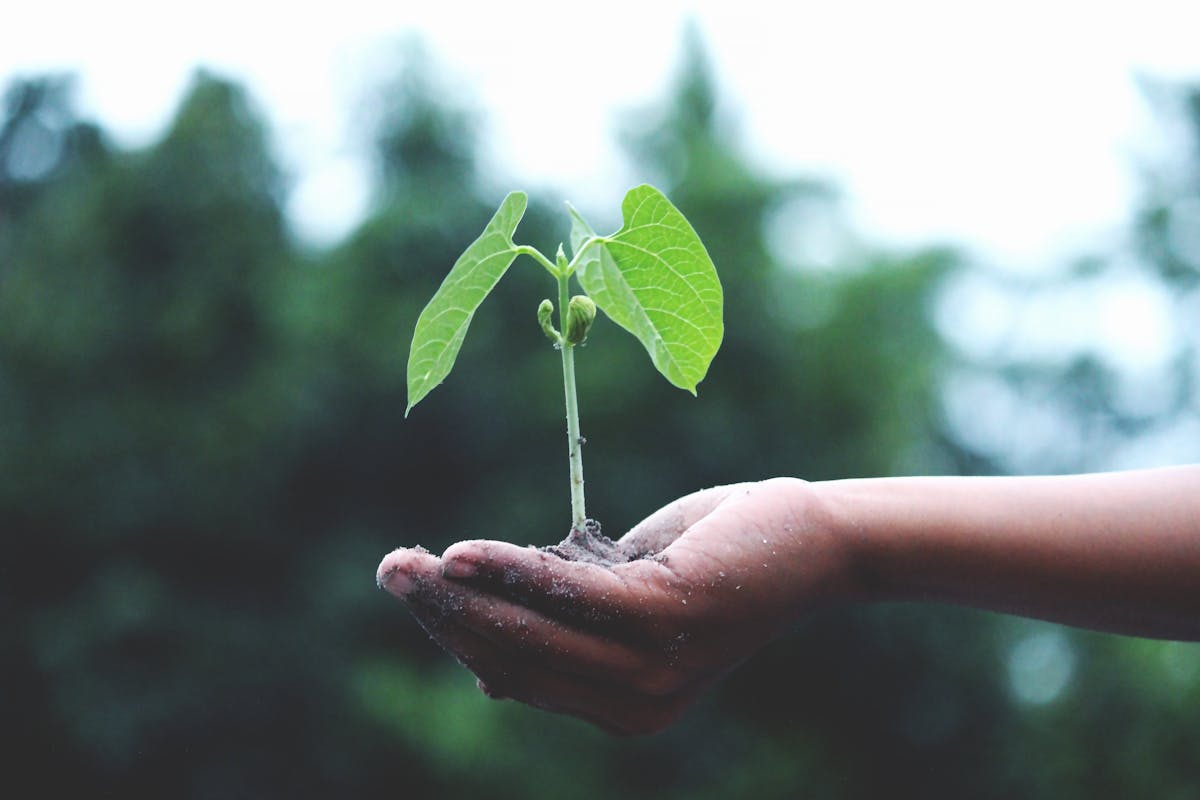
There's nothing quite like the crisp, vibrant taste of a salad made with greens you've grown yourself. Imagine stepping into your garden, or even onto your balcony, and plucking fresh, tender leaves just moments before they hit your plate. This isn't just a dream for seasoned gardeners; it's an incredibly rewarding and surprisingly simple venture for anyone with a little sunshine and a desire for better, fresher food. Growing your own salad greens is a fantastic entry point into gardening, offering quick rewards, immense satisfaction, and a continuous supply of nutrient-dense produce right at your fingertips.
Introduction: Why Grow Your Own Salad?
The allure of cultivating your own salad isn't just about the novelty; it's a practical, sustainable, and deeply satisfying choice that offers a bounty of benefits far beyond what you'll find in the grocery store aisle.
Unrivaled Freshness and Flavor: Store-bought greens often travel hundreds, if not thousands, of miles, losing flavor and nutrients along the way. When you grow your own, you're harvesting at peak ripeness, often just minutes before consumption. This "garden-to-table" speed means unparalleled crispness, vibrant color, and a depth of flavor that simply can't be replicated. Taste a homegrown lettuce head, and you'll understand the difference immediately – it's often sweeter, more tender, and bursting with life.
Cost Savings: While the initial investment in seeds or a few starter plants is minimal, the long-term savings are significant. A single packet of seeds can produce dozens, even hundreds, of salads for the price of one or two store-bought bags. Plus, with proper succession planting, you can enjoy a continuous harvest, drastically reducing your grocery bill for fresh produce.
Control Over What You Eat: Concerned about pesticides, herbicides, or other chemicals? Growing your own salad greens gives you complete control over your food's journey from seed to plate. You choose the soil, the fertilizer (organic, if you prefer), and the pest control methods, ensuring your family enjoys clean, healthy, and chemical-free vegetables. This transparency offers incredible peace of mind.
A Rainbow of Variety: Supermarket shelves typically offer a limited selection of greens. Your garden, however, opens up a world of culinary possibilities. From spicy arugula and peppery mustard greens to buttery loose-leaf varieties and robust romaine, you can experiment with dozens of cultivars, each with unique textures and flavor profiles. Discover heritage varieties, explore Asian greens, or cultivate specialty mixes – the choice is yours, tailored to your palate.
Convenience and Accessibility: Imagine needing a handful of fresh spinach for an omelet or a burst of peppery cress for a sandwich. Instead of a trip to the store, a quick step outside is all it takes. This immediate access encourages healthier eating habits and makes incorporating fresh greens into every meal effortless. For those with limited mobility or time, container gardening on a patio or balcony makes this convenience even more pronounced.
Therapeutic Benefits and Connection to Nature: Gardening is a proven stress-reducer and mood booster. The act of nurturing plants, watching them grow, and harvesting the fruits of your labor provides immense satisfaction and a profound connection to the natural world. It's a simple, grounding activity that offers both physical and mental well-being.
| Green Type | Flavor Profile | Growth Habit | Best Season | Days to Harvest (DTH) | Notes/Tips |
|---|---|---|---|---|---|
| Loose-leaf Lettuce | Mild, buttery, or slightly sweet. | Open heads, leaves branch from a central stalk. | Spring/Fall | 30-45 days | Great for "cut-and-come-again". Heat sensitive. |
| Spinach | Earthy, slightly metallic, tender. | Low-growing rosettes. | Spring/Fall | 25-40 days | Very nutritious. Bolts quickly in heat. |
| Arugula (Rocket) | Peppery, spicy, nutty. | Fast-growing, lobed leaves. | Spring/Fall | 20-40 days | Adds a kick to salads. Flowers are edible too. |
| Kale | Earthy, robust, slightly bitter (sweeter after frost). | Upright, sturdy leaves. | Spring/Fall/Winter | 30-60 days | Harvest baby leaves for salads. Very cold hardy. |
| Swiss Chard | Mild, similar to spinach but earthier. | Upright with colorful stems. | Spring/Summer/Fall | 30-55 days | "Bright Lights" variety adds beautiful color. |
| Mustard Greens | Spicy, pungent, horseradish-like. | Upright, often textured leaves. | Spring/Fall | 20-40 days | Harvest young for milder flavor. Good for mixes. |
5. Nurturing Your Greens: Water, Light & Nutrients
Once your precious salad seeds have sprouted or your young starts are nestled into their new homes, the real magic of nurturing begins. Providing the right balance of water, light, and nutrients is crucial for lush, flavorful leaves. Think of it as providing a spa day for your greens!
The Thirsty Truth: Watering Your Salad Patch
Salad greens are mostly water, and they need a consistent supply to grow tender, juicy leaves. Their root systems are relatively shallow, making them susceptible to drying out quickly, especially in containers or during hot weather.
- Consistency is Key: Aim for consistently moist, but not waterlogged, soil. Overwatering can lead to root rot and fungal issues, while underwatering causes wilting, stunted growth, and can make leaves bitter or encourage premature bolting (going to seed).
- How to Check: The best way to tell if your plants need water is to feel the soil. Stick your finger about an inch or two into the soil. If it feels dry, it's time to water.
- When to Water: Early morning is generally the best time. This allows the water to soak in before the heat of the day causes rapid evaporation, and gives any moisture on the leaves time to dry before evening, reducing the risk of fungal diseases.
- Watering Methods:
- Hand Watering: Use a watering can with a fine rose or a garden hose with a gentle spray nozzle. Aim for the base of the plants, not directly on the leaves, to minimize splash-back of soil (which can spread disease) and reduce fungal issues.
- Bottom Watering (for containers): Place containers in a tray of water and let the soil wick up moisture from below. This encourages stronger root growth and keeps leaves dry. Remove containers after 15-30 minutes once the topsoil feels damp.
- Drip Irrigation/Soaker Hoses: For larger beds, these systems deliver water directly to the root zone, minimizing waste and keeping foliage dry.
Depending on your climate, soil type, and container size, you might need to water daily, or every two to three days. Hot, windy weather or small terracotta pots will require more frequent watering.
Sun Seekers: Providing the Right Light
Most salad greens thrive in full sun, meaning at least 6 hours of direct sunlight per day. This promotes strong growth and good flavor. However, there are nuances:
- Hot Climates: In regions with intense summer heat, some salad greens (like lettuce, spinach, and arugula) can benefit from partial shade (4-6 hours of sun), especially during the hottest part of the afternoon. This helps prevent bolting and keeps leaves tender.
- Shade Tolerant Varieties: Some varieties, particularly loose-leaf lettuces and spinach, can still produce a decent harvest with as little as 3-4 hours of direct sun, supplemented by bright indirect light.
- Container Mobility: One of the great advantages of container gardening is the ability to move your plants. If your plants are struggling with too much heat or not enough sun, simply relocate their containers.
Fueling Growth: Nutrient Needs
While salad greens are often considered "light feeders," they still require a steady supply of nutrients for optimal growth. Starting with nutrient-rich potting mix or well-amended garden soil (as discussed in previous sections) gives them a great start.
- Organic Boosts: For continuous production, especially with cut-and-come-again harvesting, consider supplementing with organic fertilizers.
- Compost Tea: A gentle, nutrient-rich liquid that can be applied every 2-3 weeks.
- Liquid Seaweed or Fish Emulsion: These provide a balanced array of macro and micronutrients. Dilute according to package directions and apply every 2-4 weeks.
- Nitrogen for Foliage: Salad greens primarily need nitrogen for lush leaf growth. However, avoid over-fertilizing, especially with synthetic high-nitrogen fertilizers, as this can lead to excessive, watery growth that is less flavorful and potentially more attractive to pests.
- Observe Your Plants: Let your plants tell you what they need. Yellowing leaves can indicate a nutrient deficiency (often nitrogen) or overwatering. Stunted growth despite adequate water and light might also point to a need for more nutrients.
By paying attention to these core needs, you'll be well on your way to a thriving salad patch filled with vibrant, healthy greens.
6. The Joy of Harvest: Cut and Come Again
The moment you've been waiting for! Harvesting your homegrown salad greens is incredibly rewarding. Not only do you get to enjoy the freshest possible produce, but mastering the "cut and come again" technique means you can extend your harvest for weeks, sometimes even months, from a single planting.
When to Harvest
Timing your harvest depends on the type of greens and your preference for baby leaves or mature ones.
- Baby Greens: Many varieties, especially loose-leaf lettuces, spinach, arugula, and mesclun mixes, can be harvested as "baby greens" just 2-3 weeks after sprouting, when they're 3-4 inches tall. These are incredibly tender and have a mild flavor.
- Mature Leaves: For larger, more developed leaves, wait until plants are 4-6 weeks old. They'll have a more robust flavor and texture, perfect for heartier salads.
- General Rule: Harvest when the leaves are large enough to eat, but before they show any signs of yellowing, bitterness, or bolting (sending up a flower stalk). Regular harvesting encourages more leaf production.
The "Cut and Come Again" Technique
This method is a game-changer for continuous salad production. Instead of pulling up the entire plant, you harvest only the outer leaves or cut the plant a few inches above the soil line, allowing it to regrow.
How to do it:
- Individual Leaves: For plants like loose-leaf lettuce, kale, chard, or spinach, simply snip off the larger, outer leaves near the base of the plant using clean scissors or a sharp knife. Leave the central growing point and the smaller inner leaves intact. This allows the plant to continue producing new leaves from the center.
- Whole Plant Cut (for some varieties): For dense clusters of greens like mesclun mixes or some head lettuces (that aren't forming a tight head), you can cut the entire plant about 1-2 inches above the soil line. Be sure to leave enough foliage (the growing point and some small leaves) for the plant to photosynthesize and regrow.
- Frequency: Harvest every 1-2 weeks, or as needed. The more frequently you harvest, the more the plant is stimulated to produce new growth.
Benefits:
- Extended Harvest: Enjoy fresh greens for a much longer period from a single planting.
- Improved Flavor: Younger leaves tend to be more tender and less bitter.
- Efficiency: Maximizes your gardening space and effort.
Different Harvesting Methods Compared
| Harvesting Method | Description | Pros | Cons | Best For |
|---|---|---|---|---|
| Cut and Come Again | Snip outer leaves or cut plant 1-2 inches above soil line. | Extended harvest, continuous supply, tender leaves. | Slightly slower initial harvest, requires more frequent attention. | Loose-leaf lettuce, spinach, arugula, kale, chard, mesclun mixes. |
| Whole Plant Harvest | Pull up or cut the entire plant at the soil line. | Quick, one-time harvest, good for head-forming varieties. | Ends the plant's production, requires replanting for continuous supply. | Romaine, butterhead, iceberg lettuce, end of season harvest for any plant. |
| Baby Leaf Harvest | Snip young leaves (3-4 inches tall) from multiple plants. | Extremely tender and mild flavor, very fast production. | Lower yield per plant, requires more plants for a substantial salad. | Arugula, spinach, mesclun mixes, young loose-leaf lettuce. |
Post-Harvest Care
Once harvested, handle your greens gently to prevent bruising.
- Wash: Rinse your greens under cool water, or soak them in a bowl of cool water for a few minutes to dislodge any dirt or small critters. Spin them dry in a salad spinner or pat them dry with a clean cloth.
- Store: Store washed and dried greens in an airtight container lined with a paper towel in the refrigerator. This will keep them fresh and crisp for several days. Avoid storing them wet, as this can lead to spoilage.
Savor the unparalleled taste of your own homegrown salad – it truly tastes better when you've grown it yourself!
7. Troubleshooting Common Salad Garden Issues
Even the most seasoned gardeners encounter challenges. When growing salad greens, you might face common issues like pests, diseases, or environmental stress. The good news is that most problems have straightforward solutions, and often, prevention is the best cure.
Vigilance: Your Best Defense
Regularly inspecting your plants (at least a few times a week) is critical. Catching issues early can prevent them from spiraling out of control and save your harvest. Look for:
- Holes or chewed edges on leaves.
- Discoloration (yellowing, browning, spots).
- Wilting despite adequate water.
- Tiny insects on the undersides of leaves or along stems.
- Slime trails.
Common Salad Garden Issues and Solutions
Here's a guide to some frequent problems you might encounter and how to tackle them:
| Issue | Symptoms | Causes | Solutions | Prevention Tips |
|---|---|---|---|---|
| Aphids | Curled/yellow leaves, sticky residue (honeydew). | Small soft-bodied insects sucking sap. | Blast with water, insecticidal soap, neem oil. | Attract ladybugs (natural predators). |
| Slugs & Snails | Large irregular holes in leaves, slime trails. | Wet conditions, nocturnal feeding. | Hand-pick at night, beer traps, copper tape, diatomaceous earth. | Remove hiding spots (debris), water in morning. |
| Bolting | Plant sends up flower stalk, leaves turn bitter. | Heat stress, long days, plant maturity. | Harvest immediately. Plant heat-tolerant varieties. | Mulch to keep roots cool, provide shade, water consistently. |
| Powdery Mildew | White powdery spots on leaves. | High humidity, poor air circulation. | Remove infected leaves, baking soda/water spray, neem oil. | Space plants properly, water at base (not leaves). |
| Root Rot | Wilting, yellowing, mushy brown roots. | Overwatering, poor drainage. | Let soil dry out, improve drainage. | Ensure pots have holes, don't overwater. |
